Vine Post: Vegan Bounty Fail

Vegan bounty bites?

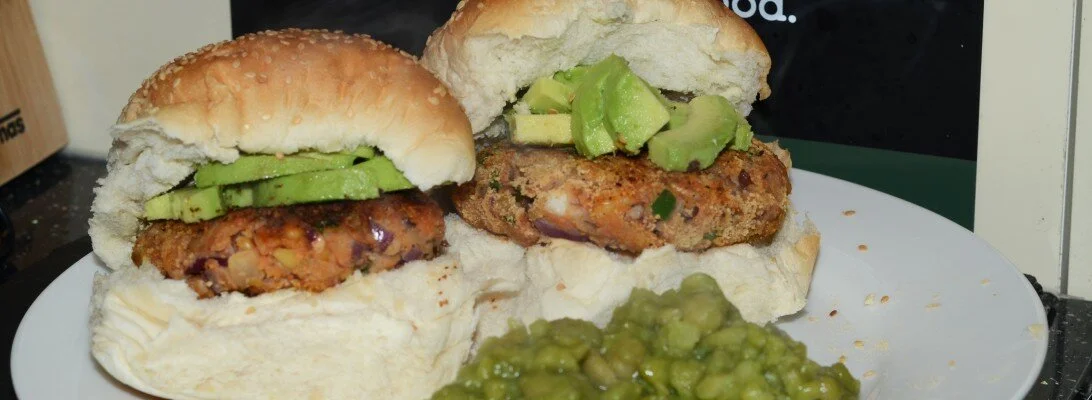
When you’re an ordinary person learning how to cook crazy things, like me, it’s not always smooth sailing. I had to share this one today because it actually made me laugh so much. You’ve probably heard of so-called “Pinterest fails”, where people try out tips from Pinterest and found that they are almost impossible to actually carry off. Similarly, I recently tried out a recipe for vegan bounty bars, and…. yep. You’re about to see the results for yourself.

First of all, let me show you the Vine. It actually went pretty well to start with. I made some coconut bars, which taste great and really do the job. Then I froze them. Then I made the non-chocolate chocolate coating to go over the top. And then… Well.

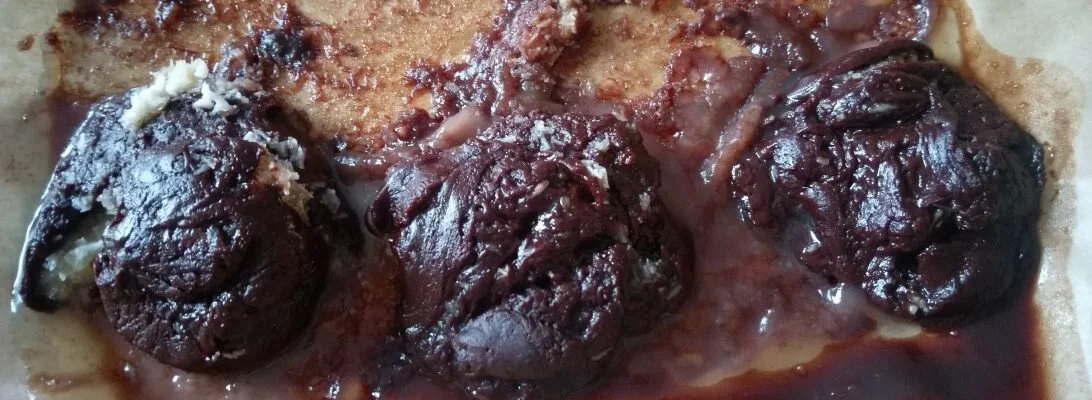
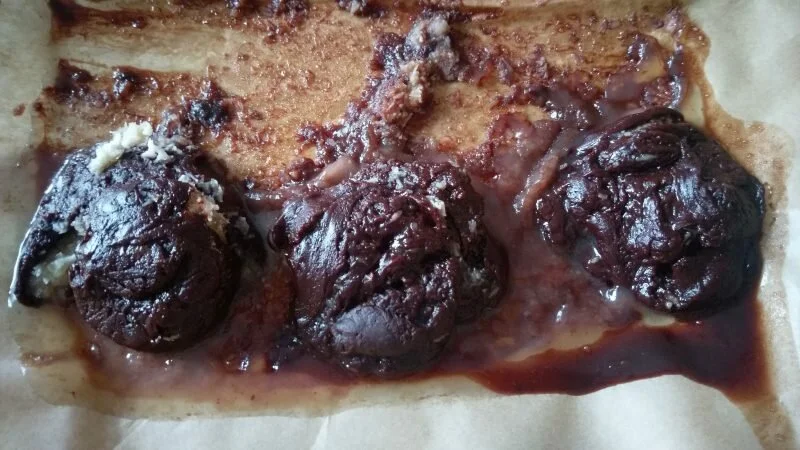
After making everything so well, the next step was supposedly to put the bounty bars into the chocolate mixture to get them coated. So I had to put frozen coconut bars into melted hot chocolate. Can you see where this is going? Straight away everything started to just fall apart completely.

In the end, I managed to get three “blobs” and a whole lot of mixed up chocolate and coconut… It’s so terrible I just had to laugh and laugh! The good news is that it actually tasted pretty good, if you were willing to scrap up little bits of it here and there… 

Vegan bounty bites?
Vegan bounty bites?

So there you go – I’m certainly not perfect at cooking by a long way! But when you can laugh at your mistakes, it’s always worthwhile. I’ll be thinking about this recipe and how to get those two elements combined better next time!

StumbleUponBufferEmailShare

Vine Recipe: Mushroom Nut Loaf

Recently we decided it was time to do the proper Sunday lunch thing. Let’s have a traditional veggie nut loaf, we thought – something to enjoy with roast veggies and mash! I tracked down this amazing recipe, which was so easy to make and so, so rewarding. Give it a try if you are after that classic Sunday dinner that is going to last you days and days!

I made a bit of a mistake while putting this together – I misinterpreted the quantity for the rice. It’s supposed to be already cooked at the weight given here, not dry! In the end, I had so much extra rice that we ended up having it as a side serving with our nut loaf, so maybe not quite the traditional Sunday lunch after all!

It’s great for leftovers and keeps easily for a few days. My favourite trick with anything like this is to cut off a nice slice and fold it into a wrap. You can include any leftover veggies as well that will fit, then heat it up in the microwave for 30 seconds or so. It’s especially delicious with peas. There you have an easy and delicious lunch solution for a couple of days after you make it!

Here’s the Vine, and scroll down below for the recipe:

Mushroom Nut Loaf
A traditional nut loaf recipe incorporating mushrooms and rice.
Write a review
Save Recipe
Print
Ingredients
  1. 1 red onion, chopped
  2. 2 cups finely-chopped chestnut mushrooms
  3. 1 cube frozen garlic
  4. 5 tsp mixed Italian herbs (Schwartz)
  5. Splash of red wine
  6. 2 cups cooked basmati rice
  7. 1 cup almonds, ground
  8. 1 cup cashews, finely chopped
  9. 5 eggs
  10. 1 cup cottage cheese
  11. 1/2 cup grated red Leicester (feel free to substitute for any other melty cheese)
  12. 1/2 cup Italian Herb mix (Schwartz)
  13. Salt and pepper
Instructions
  1. Preheat oven to 180°C.
  2. Sauté the onion until it begins to soften.
  3. Add the mushrooms and a pinch of salt and pepper, and cook until the mushrooms release their juices and become soft.
  4. Add the garlic and dried herbs, and continue to cook.
  5. When the pan begins to dry out again, add a good splash of red wine and cook until it is moist but not swimming in liquid.
  6. Remove from the heat and let cool a little.
  7. Butter or oil a roughly 9-inch loaf pan and line with parchment paper or foil.
  8. In a large bowl, toss the rice and nuts together.
  9. In a separate bowl, beat the eggs with the cottage cheese.
  10. Add the egg mixture to the rice/nut mixture, then stir in the cooled mushrooms, grated cheese and fresh herbs.
  11. Mix well.
  12. Fill the loaf pan with the nut mixture, rap a few times on the counter to get rid of any air bubbles and smooth the top with a spatula.
  13. Bake for about an hour or until the loaf is firm. Remove from the oven.
  14. Leave to cool for ten minutes, then lift the loaf from the pan using the excess parchment paper or foil.
  15. Peel off the parchment or foil and serve.
Notes
  1. You can pretty much mess around with this recipe as much as you like. More or less rice, more or less cheese, different cheese, different herbs, sherry instead of wine, white wine, different kinds of mushroom, more veggies, different nuts - whatever you want, give it a try. It's likely to work!
Adapted from The Kitchn
VegBurge https://vegburge.com/
StumbleUponBufferEmailShare

Vine Recipe: Veggie Bacon Gnocchi

Gnocchi is back! We actually love making our own gnocchi and find it a really simple but delicious meal to make. This recipe is adapted from our simple gnocchi recipe to give it that little something extra special: bacon! Obviously, we aren’t including real bacon, but we’ve discovered the Quorn bacon lardons which are really delicious when cooked up properly.

Bacon gnocchi in tomato and herb sauce with rocket and feta

It’s a simple change to the recipe, so follow the instructions in the link above with one little addition. Firstly, while you are making the gnocchi, you want to start by putting some of the lardons in a frying pan with some oil. Cook them until they are nicely browned, then set them aside and let them cool while you do the rest of the preparations.

Next, when you come to time to roll your gnocchi, take one or two pieces of veggie bacon per gnocchi. The square shape of this product is perfectly suited because it will fit inside the gnocchi so easily without poking out or affecting the final look. Fold your piece of dough to enclose the gnocchi and pinch the sides a little to quickly seal it in. Next you roll between your hands or fingers to get that rounder shape. Don’t be afraid to reshape it and roll it more if you feel it doesn’t look right – it’s very pliable and won’t suffer from being handled more.

That’s all you need to do – the gnocchi will cook just as normal with the bacon inside! It gives it a bit more of an interesting texture, as each piece has that little smokey surprise inside. You can also scatter leftover pieces over the top to finish the dish – our serving method of choice is to layer rocket and tomato sauce over the gnocchi as you fish them out of the pan. This really finishes it off nicely!

Here’s the Vine so you can see how that extra step works:

StumbleUponBufferEmailShare

Vine Round Up (April 2016)

Hi all! Now, if you only follow us here on the blog, you most likely already know that we usually post Vine videos on Mondays. What you may have seen is that every now and then there’s no post on a Monday – usually when the Vine doesn’t require a recipe to go along with it. In order to keep you all up to date, this is a quick Vine round up of some of the delicious clips we’ve posted lately that didn’t quite make it onto the blog. Most of them are pretty self-explanatory, which is why we didn’t do recipe posts for these – but if you have any particular questions, please feel free to leave a comment and ask away. In the meantime, feast your eyes…

Here’s our rice bowl with butter beans, egg, and tomato:


Everyone should try a quinoa tabbouleh at least once in their lives:

How about giving this roasted butternut squash and pine nut soup a try?:

Finally, our Vine round up had to include how to make your own pumpkin puree:

StumbleUponBufferEmailShare

Vine Post: Super Simple Gnocchi

This is possibly the simplest recipe in the world, and I have no idea why it took me this long to try it. I always thought that it must be really difficult to make gnocchi – surely? But as it turns out, it’s so simple you can make it a regular meal staple. It’s delicious to do and you can cut down a lot of time with one simple cheat: buying frozen mash instead of mashing the potatoes yourself.

Sure, it sounds lazy, but it turns a long recipe into something you can do after a day at work with no problem. And that’s definitely a good thing. We have some plans to bring you some new gnocchi variations in future recipes, so definitely give this one a try – you will be amazed at how easy it is. With the extra time that you save from the mashed potato, you can make up a batch of simple green pesto to go with it, too.

Here’s the vine:

And the recipe:

Super Simple Gnocchi
The easiest pasta you'll ever make!
Write a review
Save Recipe
Print
Ingredients
  1. 500g Frozen mashed potato (defrosted in microwave)
  2. 200g Plain flour
Instructions
  1. Add the flour to the potato and fold in until well mixed as a dough.
  2. On a floured surface, roll out the dough to your desired thickness.
  3. Cut it into strips and roll each individual strip into a tube shape.
  4. Cut each tube into sections around 2-3 cm long.
  5. (optional) Roll the individual pieces to round out the edges if desired.
  6. Use a fork to press down onto each piece, firmly enough to make ridges but not so hard to destroy the shape.
  7. Add the gnocchi to a pan of salted, boiling water.
  8. When they rise to the surface, remove them from the pan with a slotted spoon to drain out any water.
  9. Serve immediately in sauce of your choice.
Notes
  1. Home-made pasta doesn't have to be snobby. Don't worry about the shape of your gnocchi - if it's not quite the same as you buy in shops, who cares?
  2. Make sure to only use plain flour and plain mash - we tried it with cheesy mash and it just didn't work. The same with self-raising flour. It has to be plain when you start, but we'll be showing you some variations to change the flavour soon!
VegBurge https://vegburge.com/
StumbleUponBufferEmailShare

Vine Post: Muttar Paneer

Alright, get ready for some serious paneer action! J and I LOVE paneer and can be relied upon to order a dish containing it whenever the opportunity arises. We decided we wanted to see if we can bring our favourite Indian takeaway meal home, and make it ourselves. I’ll be upfront and say that mine is not 100% as good as our local Indian does it – but then again, it’s probably substantially healthy, so it’s more or less a good compromise.

As usual, here is the Vine of us making this dish:

It was delicious, so there was no way I wasn’t going to share this with you. We adapted a lot of this recipe from a more unhealthy version and also made it vegetarian, so this is a great option to try. If you want it vegan, try it with tofu instead of paneer – you won’t need to change the cooking instructions or the quantities, just make a straight switch.

Muttar Paneer
Serves 2
Write a review
Save Recipe
Print
Ingredients
  1. 2 cups paneer cheese (cubed)
  2. 1 ½ cups green peas
  3. 1 teaspoon ginger
  4. 1 tin chopped tomato
  5. 2 teaspoons cumin
  6. ½ teaspoon turmeric
  7. salt to taste
Instructions
  1. Heat oil in a large pan or wok. Add the paneer and cook until it's light brown. Add cumin.
  2. Add turmeric, salt, tomatoes, and ginger. A pinch of sugar for the tomatoes is a great addition.
  3. Add the peas. Add some water at this point if it is too thick (2 cups maximum).
  4. Bring to a boil and let simmer for 5 to 10 minutes.
  5. Serve!
Notes
  1. Great with traditional Indian sides, eg: naan breads, bhajis, samosas.
VegBurge https://vegburge.com/
P.S. This is also one of my favourite dishes because it reminds me of the muttaburrasaurus. True story.

StumbleUponBufferEmailShare

Vine Post: Kracie Poppin’ Cookin’ DIY Gummy Land Kit

This one has been something we’ve been looking to do for a while, and it was SO MUCH FUN. Oh my gosh, I can’t even tell you how much fun. I get a Kawaii Box every month which is full of lots of exciting things, and I’ve now received a couple of these Poppin’ Cookin’ DIY candy kits. You do have to be careful as not all of them are suitable for vegetarians, but the DIY gummies are according to English translations I’ve seen.

I love this idea of making sweets for yourself, as it adds a great new element of fun. I’ll be honest, these gummies didn’t taste all that good. They were hugely fun to make and decorate, however, and they look fantastic. It’s more about the experience than the taste, so it doesn’t matter so much. Like little kids, we also tried drinking the colouring from the pipette, and that tastes fine haha!

If you have this kit yourself and need English instructions, you will find them here. I definitely recommend having a look because I’m not sure you would figure out how to get this right just by guesswork. Once you know what you are doing, however, it’s really easy. You just have to be a bit careful with the pipette so you don’t spray droplets into the gummy mix when you don’t mean to. Watch us give it a try here:

I really didn’t want to eat my beautiful rainbow snowflake but in the end I just had to! So much fun and I will definitely be trying one of these Poppin’ Cookin’ kits again if the opportunity arises.

StumbleUponBufferEmailShare

Vine Post: Chili Bean Cakes

Chili Bean Cakes

This week we’ve got one of our favourite things to share with you: a new veggie burger recipe! This one is adapted from a cookbook simply titled “Vegetarian” which I’ve had since my student days but never really delved too much into. Before you get too excited, I’ll be bringing you the recipe and review on Wednesday – for now we’re just going to take a look at the tasty, tasty Vine!

Chili bean cakes
Chili bean cakes

These chili bean cakes are so, so easy to make. They are really rewarding too – especially when served up with slices of avocado. We also put them in fluffy white sesame buns, with some vegan cheese spread (we are addicted to Sheese) and dressings of choice. Served up with some mushy peas, they were incredibly filling, and that was enough for the whole night.

Well, you will hear more about them in the recipe post, but for now, here’s the Vine of these chili bean cakes being made:

StumbleUponBufferEmailShare

Vine Recipe: Sweet Potato Macaroni Cheese Bake

One of the latest additions to our cookbook shelf is Simply Nigella, which J received for Christmas, so we’ve been trying out a few of the recipes from it and playing around with them. As soon as I read about this sweet potato version of macaroni cheese, I knew I had to give it a try. As you’ll see below (especially if you have the book to compare to), we did change a few things around and put our own spin on it. Here’s what we came up with!

This was so delicious that we served out half the dish, then came back for seconds. There’s just something magical about sweet potato, cheese, and pasta that I never would have thought of before. I did cheat a little bit: I had some cheese sauce left over from making a lasagne in the week, and since the recipe calls for lots of butter, I decided to skip that part and use my sauce as a base. You can find your own healthy cheese sauce recipe if you wish! Vegan cheese in particular has come on leaps and bounds, so be sure to give it a try if you want a version that is lower calorie and doesn’t require butter or milk.

Sweet Potato Cheese Bake
Serves 2
Originally conceived by Nigella as as a Macaroni Cheese variation, here we've transformed it into a proper cheese bake.
Write a review
Save Recipe
Print
Ingredients
  1. 500g sweet potatoes
  2. 300g large pasta shells
  3. Half jar of cheesy sauce (eg white lasagne sauce)
  4. 1 tsp English mustard
  5. 1/2 tsp paprika (split in half)
  6. 75g feta cheese
  7. 150g grated cheddar
Instructions
  1. Peel the sweet potatoes and chop into rough 2cm pieces.
  2. Boil a pot of water, add salt, and cook sweet potato pieces for around 10 mins until soft.
  3. Scoop potatoes out of the pan with a slotted spoon, reserving the water for later.
  4. Mash sweet potato into a puree with a fork.
  5. Stir 1/4 tsp paprika and English mustard into the cheesy sauce until fully mixed.
  6. Add the pasta to the sweet potato water and cook according to packet instructions; remove two minutes early.
  7. Drain pasta and fold into the sweet potato mash.
  8. Fold in the white sauce and 125g cheddar.
  9. Place into a baking dish and sprinkle with remaining 25g cheddar and 1/4 tsp paprika.
  10. Bake for around 30 mins at 200c.
Notes
  1. This dish is a great way to use up extra sauce. I find a lasagne only ever needs half a jar of white sauce, so making this the day or days after will use up the excess.
Adapted from Simply Nigella
VegBurge https://vegburge.com/
StumbleUponBufferEmailShare

Vine Post: Coconut Bacon

So, this one has been coming for quite some time. J has been itching to try his hand at coconut bacon (he’s on a desperate hunt for a flavour that is as close to real bacon as possible), and he finally got the chance last week. Since then we’ve had another batch made as it is just so unbelievably delicious – he even admits to preferring this flavour to the real thing, which is big praise from a bacon fanatic!

There are a lot of recipes that tend to make non-veggies a bit suspicious, and this has to be one of them. Surely, they say, getting some random fruit or vegetable and cooking it in a certain way can’t replicate the taste of actual animal products? Well, just as I can say without a doubt I’ve found vegan cheese that I can’t distinguish from real cheese, so you can say that this really tastes like maple-flavoured bacon. This is, if you will, the Holy Grail for ex-carnivores.

Myself, I’ve never tasted bacon, so I left this one up to J. While I was recovering from watching the Oscars and going to bed past 5am, he whipped up this amazing batch which is perfect for snacking throughout the day or topping all manner of meals. We present to you the astonishing coconut bacon:

Want to make it yourself? Here’s how!

Maple Coconut Bacon
Coconut that tastes like bacon - perfect topping for soups and burgers, or great as a snack on its own
Write a review
Save Recipe
Print
Ingredients
  1. 2 tablespoons soy sauce
  2. 1 tablespoon liquid smoke
  3. 1 tablespoon maple syrup
  4. 1/2 teaspoon smoked paprika
  5. 1/4 teaspoon BBQ seasoning
  6. 1 teaspoon Cayenne pepper
  7. 3 1/2 cups large flaked coconut
  8. pinch of salt
Instructions
  1. Preheat oven to 180 degrees.
  2. Mix soy sauce, liquid smoke, maple syrup, and seasoning in a large bowl.
  3. Add coconut flakes and gently toss, making sure to coat each flake well.
  4. Using a slotted spoon, scoop seasoned coconut flakes and place onto a baking tray.
  5. Sprinkle coconut flakes lightly with a bit of salt if desired.
  6. Place in oven and bake for 20-25 minutes. Stir every 5 minutes making sure to rearrange all pieces for even cooking.
  7. After the first 15 minutes, keep a close watch as the coconut bacon can burn very quickly.
  8. Remove when coconut has a nice browned and caramelized color.
  9. Allow to rest and cool - it will crisp up more.
Notes
  1. Experiment with the spices you use - there's no need to stick to traditional flavours. The liquid smoke and maple syrup are key, but you can change the other options around for different taste combinations.
Adapted from The Simple Veganista
VegBurge https://vegburge.com/
StumbleUponBufferEmailShare